
The 1-on-1 Room is designed for direct, two-way AI interpreted conversations between a host and a single guest. You can connect using a second tablet if you have the ILA Pro, or users can connect with their own device using a QR code. If the device is already in use when a second person calls, they will be able to wait on hold until the 1 on 1 Room is free. It’s ideal for settings like school front offices, medical practices, or any situation where you need to communicate one-on-one with someone who speaks a different language — including remote conversations.
1 on 1 Room

Room Description
When to Use the 1 on 1 Room
- Front office at schools, doctor’s offices, libraries, apartments, etc.
- Conversations with just one other person
- Remote conversations where a parent, patient, or client needs to call your organization with translation. (See connecting with a QR code or Weblink)
Before You Start
- If using the web app version (as opposed to the two sided tablet), be sure to have the QR code displayed so your guest can easily scan and join!
(See Section on Getting Your QR Code) - Your guest is the one who will initiate the interaction. You cannot begin a conversation in the 1 on 1 Room as a host; You must wait for the guest to do so.
Getting Your QR Code
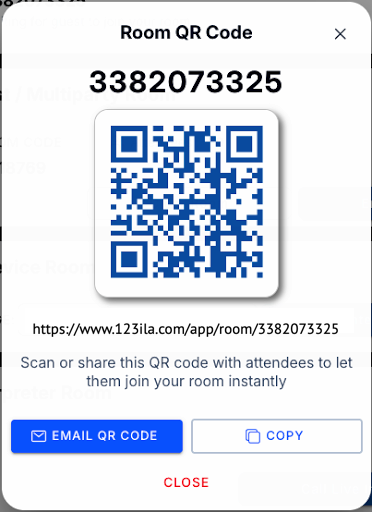
- Click on the small image of the QR code beneath the 1 on 1 Room.
- In the pop-up box, click the “Email QR Code” button.
- Where prompted, enter in your email address.
- You will receive an email containing the image of your QR code. You only need to do this one time as your QR code will not change.
Save the image on your computer to be able to use at any time. - Use the image to create a flyer you can display on the counter for users to connect when they need translation.
- You can also put the QR code on your website, email it to users, or display it on your powerpoint slides.
How to Use the 1 on 1 Room
Connecting (both ILA Guest and via QR code/weblink)
ILA Guest
- Guest approaches the tablet and selects a language and dialect
- Once the guest selects their language the session will begin
QR Code or Weblink
- Guest scans QR code on a phone or tablet or uses the weblink in any browser
- Guest selects their language and dialect
- Guest has an option to enter their name and email address
(Note: this information does not come to TranslateLive—it is just for you as the host) - Guest clicks the “Enter Room” button
- The Host tablet will begin to ring, flash red and green, and ask if you would like to accept the call.
- Host pushes “yes” and the session begins
Step by Step
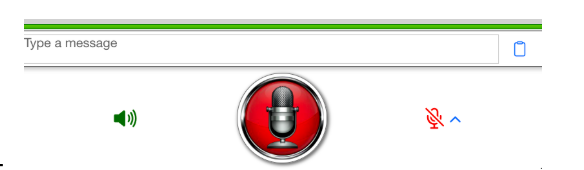
- Ensure that the speaker icon to the left of the microphone is green to enable text to speech (have the ILA speak the interpretation out loud)
Do this on both the Host side and the Guest side

- In order to speak, hold down the big red microphone button. Release when you are finished talking. The ILA will speak the translation out loud and you will also see a text bubble.

- For the guest to respond they will do the same thing, holding down the button while speaking.
- If you have something longer to say or need to be hands-free, then use the small microphone button. Click it once to activate the microphone, say whatever you need to say, and then click it again so the guest may respond.

- Continue to go back and forth until you are finished with your conversation.
Using Common Phrases
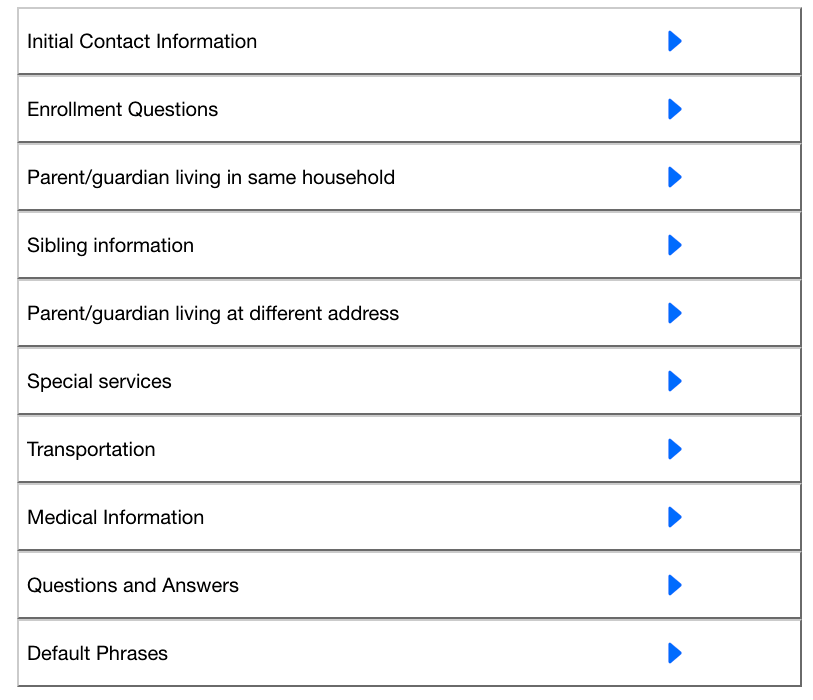
- To access your stored Common Phrases, click the book in the bottom left corner of your screen.

- You will see the list of categories you have entered. Click on the arrow to see all of the questions or phrases in that category.
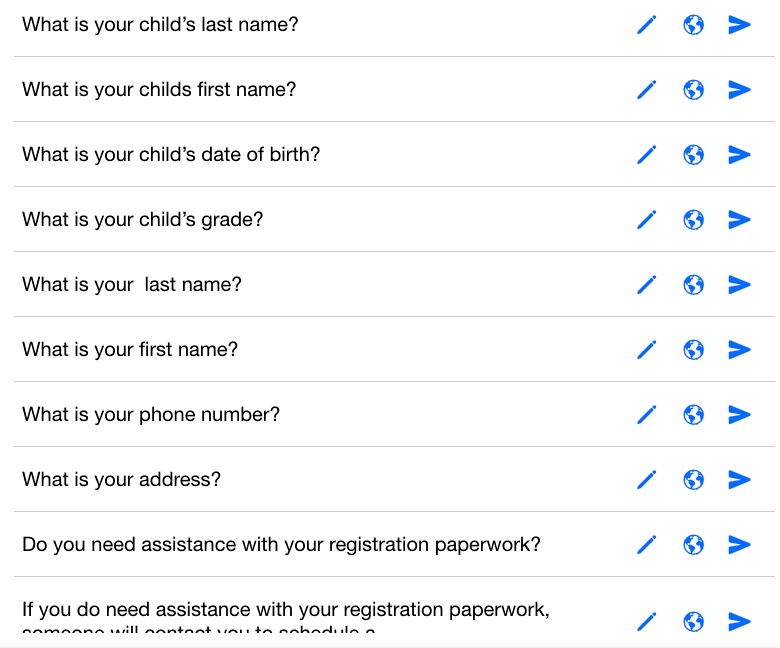
- Press the airplane to send a phrase through to your guest in their selected language.
Ending a Session
- End a session by clicking the blue “End” button in the top right corner of the screen.
- The session can be ended by either the guest or the host.

Best Practices
- Speak slowly and clearly, enunciating your words.
- Avoid slang or idioms.
- If experiencing jumbled sentences, or random words mixed in with what you are saying, try turning down the microphone sensitivity, located to the right of the small microphone.
- Be sure only one person is holding down the microphone at a time.
